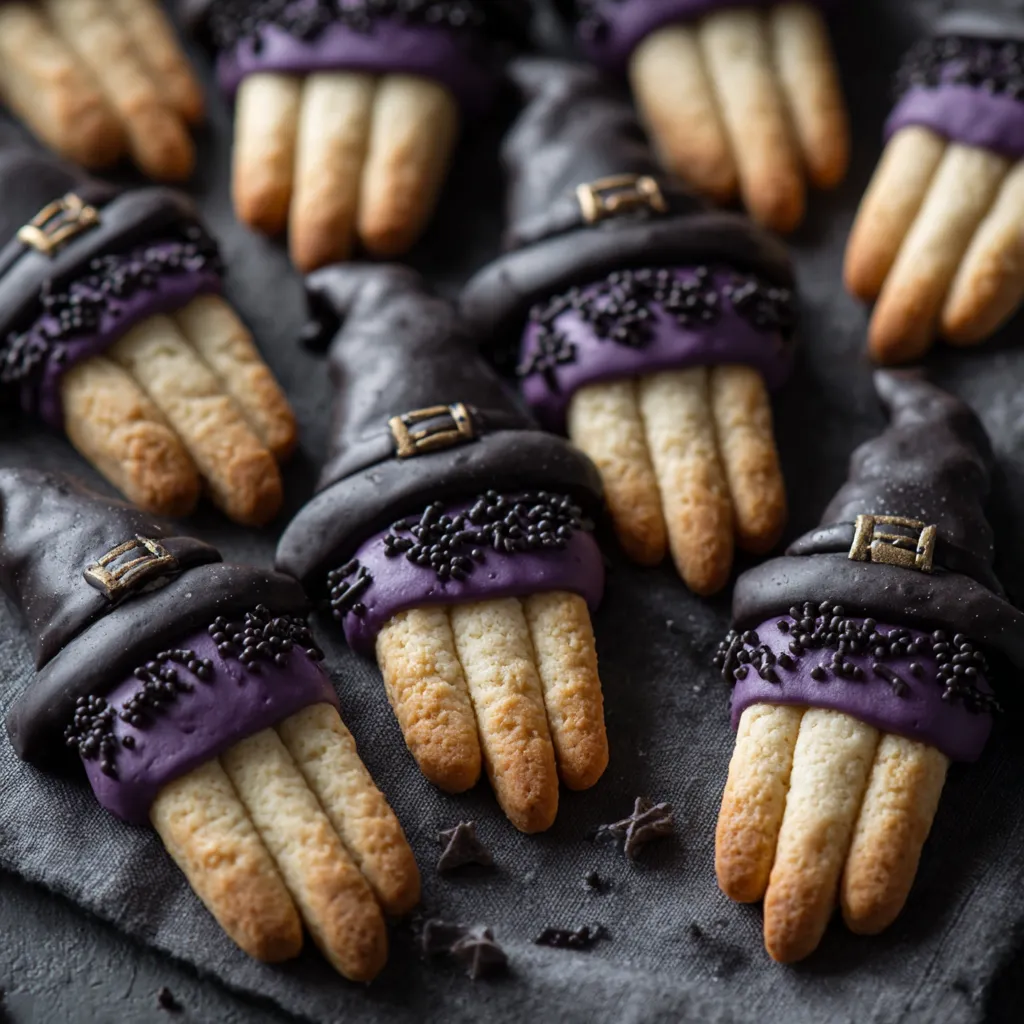
Halloween is the season of creepy costumes, eerie decorations, and of course, spooky-themed recipes that make your celebration unforgettable. Among the most iconic Halloween treats, Witch Finger Cookies stand out for their frighteningly realistic look and buttery, delicious taste. These cookies are shaped like gnarled witch fingers, complete with almond nails and a touch of red “bloody” jam or gel.
Not only do Witch Finger Cookies look chillingly realistic, but they’re also surprisingly easy to make. Perfect for Halloween parties, school events, or trick-or-treat gatherings, these cookies are a guaranteed showstopper that will delight kids and adults alike.
In this guide, we’ll cover everything you need to know about making Witch Finger Cookies at home: the full ingredient list, step-by-step instructions, essential kitchen tools, tips for success, and even variations to make them your own. Whether you’re a seasoned baker or a beginner, you’ll love how fun and delicious these spooky cookies turn out.
Ingredients for Witch Finger Cookies
To achieve the creepy look and buttery taste of Witch Finger Cookies, you’ll need the following ingredients:
- 1 cup unsalted butter (softened at room temperature)
- 1 cup powdered sugar (confectioner’s sugar)
- 1 large egg
- 1 teaspoon vanilla extract
- 1 teaspoon almond extract (optional, for flavor depth)
- 2 2/3 cups all-purpose flour
- 1 teaspoon baking powder
- 1 teaspoon salt
- 1 cup whole almonds (for the “fingernails”)
- 1/2 cup strawberry or raspberry jam (for the “bloody” effect)
- Red or black decorating gel (optional, for extra spooky details)
Kitchen Tools You’ll Need
To make Witch Finger Cookies successfully, gather these tools:
- Large mixing bowls
- Electric hand mixer or stand mixer
- Measuring cups and spoons
- Rubber spatula
- Baking sheets lined with parchment paper
- Plastic wrap (for chilling dough)
- Butter knife or toothpick (for creating knuckle lines)
- Cooling rack
Step-by-Step Instructions for Witch Finger Cookies
Step 1: Make the Cookie Dough
In a large bowl, cream together the softened butter and powdered sugar until smooth and fluffy. Add the egg, vanilla extract, and almond extract. Mix until combined.
In a separate bowl, whisk together the flour, baking powder, and salt. Gradually add the dry ingredients into the butter mixture until a smooth dough forms.
Step 2: Chill the Dough
Wrap the dough in plastic wrap and refrigerate for at least 30 minutes. Chilled dough is easier to shape and prevents the cookies from spreading too much during baking.
Step 3: Shape the Witch Fingers
Preheat your oven to 350°F (175°C). Remove the chilled dough and scoop out small portions (about 1 tablespoon each). Roll each piece into a thin log, about the length of a finger.
Press one almond firmly into the end of each log to form a fingernail. Using a butter knife, make small horizontal indentations in two spots along the log to resemble knuckle creases. Pinch the dough slightly above and below the knuckle marks to create a more realistic finger shape.
Step 4: Bake the Cookies
Place the shaped fingers on a baking sheet lined with parchment paper, leaving space between each. Bake for 15–20 minutes, or until the cookies are lightly golden.
Step 5: Add the Creepy Details
Once baked, allow the cookies to cool for 2–3 minutes. Carefully lift off the almond “nail,” place a small amount of strawberry jam or red gel where the almond was, then press the almond back in place so the “blood” oozes out around it. You can also dab some jam on the opposite end of the cookie for a severed finger effect.
Transfer cookies to a cooling rack to cool completely before serving.
Tips for Perfect Witch Finger Cookies
- Don’t skip chilling the dough – it prevents spreading and helps cookies hold their shape.
- Use whole almonds for the most realistic fingernail look. If you want variety, use pumpkin seeds for a different effect.
- Get creative with decorations – add food coloring to the dough (green or gray for a creepy look) or use cocoa powder for a darker finger tone.
- Make it gory – drip extra jam along the “fingers” for a bloodier, scarier cookie.
- Plan ahead – the dough can be made up to 2 days in advance and stored in the refrigerator until you’re ready to bake.
Variations of Witch Finger Cookies
- Gluten-Free Version: Use gluten-free flour instead of all-purpose.
- Vegan Version: Replace butter with vegan butter and egg with a flaxseed egg.
- Green Witch Fingers: Add green food coloring to the dough for extra spooky effect.
- Chocolate Dipped Fingers: Dip the ends in melted chocolate instead of jam for a sweeter variation.
serving Ideas for Witch Finger Cookies
- Arrange them on a black or orange platter with fake spider webs and plastic spiders for a Halloween party.
- Pair with a Halloween punch like Sparkling Cranberry Punch for a festive table.
- Pack them in clear treat bags with a ribbon for Halloween party favors.
- Place them in a cauldron bowl for a witch-themed dessert display.
Approximate Nutritional Information (per cookie)
- Calories: 120
- Fat: 7 g
- Carbohydrates: 14 g
- Protein: 2 g
- Sugar: 8 g
Why Witch Finger Cookies Are the Perfect Halloween Treat
- Visual Impact – They look eerily realistic and instantly get people talking.
- Easy to Make – No fancy tools or complicated steps required.
- Fun for Kids – Children love shaping the dough and decorating the “fingers.”
- Versatile – Customize colors, decorations, and flavors to suit your party theme.
- Crowd-Pleaser – Delicious buttery cookies that taste as good as they look.
Conclusion
Halloween is all about creativity, and Witch Finger Cookies embody the spirit of the season. They’re creepy, delicious, and fun to make—an absolute must for your spooky festivities. Whether you’re hosting a big Halloween bash, sending treats to school, or just enjoying a fright night at home, these cookies will steal the show.