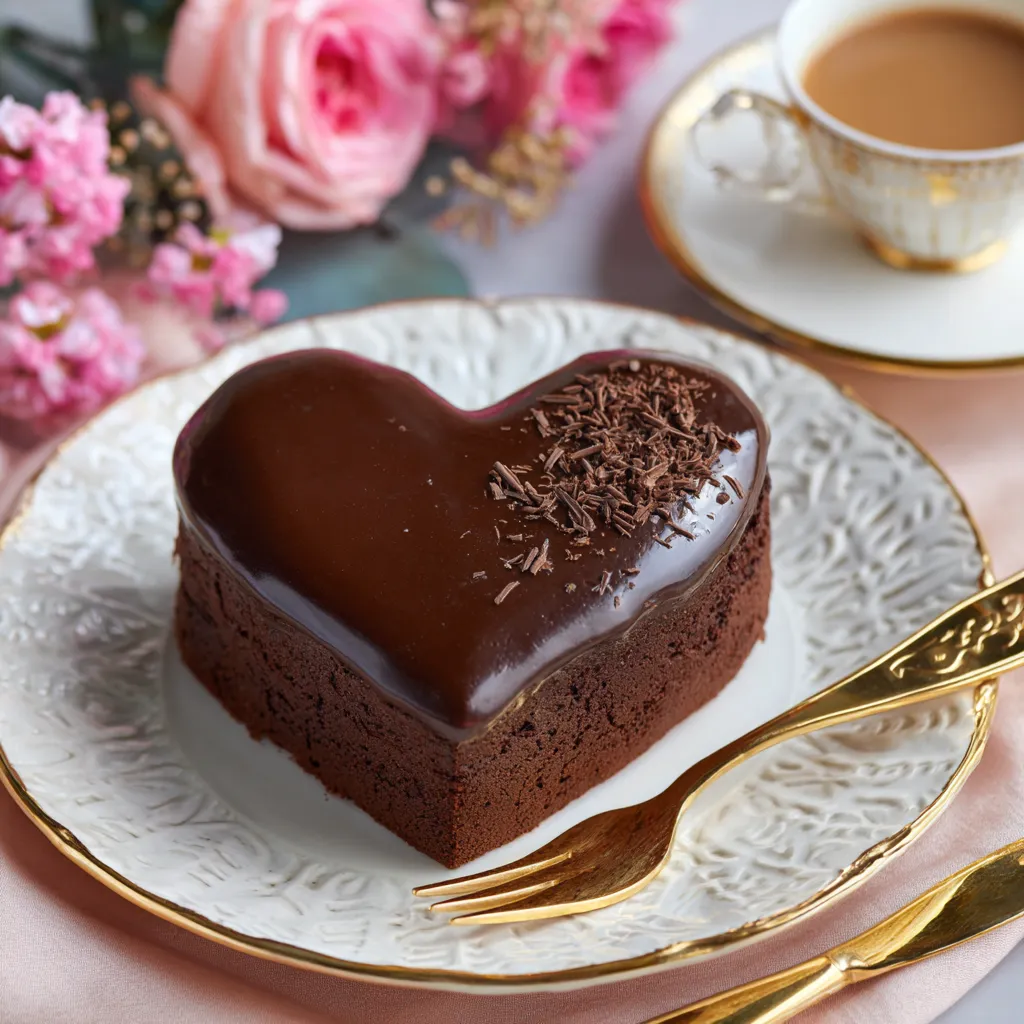
There’s something magical about a dessert that not only satisfies your sweet tooth but also tells a story. A Heart-Shaped Chocolate Cake is more than just a cake—it’s a symbol of love, celebration, and indulgence. Whether you’re baking it for Valentine’s Day, an anniversary, Mother’s Day, or simply to surprise someone special, this decadent dessert is guaranteed to make hearts melt.
In this ultimate guide, we’ll explore everything you need to know about baking the perfect Heart-Shaped Chocolate Cake. From the ingredients list to step-by-step preparation, decorating ideas, expert tips, nutritional breakdown, and creative serving suggestions, this article will help you master the art of creating a stunning cake that looks as good as it tastes.
So, let’s preheat that oven and dive into the world of chocolatey romance!
Why a Heart-Shaped Chocolate Cake?
Chocolate cake is a universal favorite. Its rich, moist texture and deep cocoa flavor make it the dessert of choice for countless occasions. But when you shape it into a heart, you transform a classic into something extraordinary.
A Heart-Shaped Chocolate Cake symbolizes love, affection, and celebration. It’s perfect for:
- Valentine’s Day: The ultimate romantic dessert to end a candlelit dinner.
- Anniversaries: Show your partner how sweet life is with them by your side.
- Mother’s Day: Because moms deserve something made with love.
- Birthdays: Add a romantic twist for someone special.
- Weddings or Engagements: A cake that speaks louder than words.
Ingredients for Heart-Shaped Chocolate Cake
Here’s everything you’ll need to make this irresistible dessert.
For the Cake Batter:
- 1 ¾ cups all-purpose flour
- 2 cups granulated sugar
- ¾ cup unsweetened cocoa powder (high quality)
- 2 teaspoons baking soda
- 1 teaspoon baking powder
- 1 teaspoon salt
- 2 large eggs (room temperature)
- 1 cup buttermilk (room temperature)
- ½ cup vegetable oil
- 2 teaspoons pure vanilla extract
- 1 cup boiling water (or hot coffee for deeper flavor)
the Chocolate Ganache Frosting:
- 2 cups semi-sweet chocolate chips (or chopped chocolate)
- 1 cup heavy cream
- 2 tablespoons unsalted butter (for shine and smoothness)
Optional Decoration:
- Fresh strawberries or raspberries
- Shaved chocolate curls
- Powdered sugar dusting
- Whipped cream rosettes
- Edible glitter or heart-shaped sprinkles
Kitchen Tools Needed
- Heart-shaped cake pan (9-inch recommended)
- Mixing bowls (large and medium)
- Electric mixer or whisk
- Rubber spatula
- Measuring cups and spoons
- Wire cooling rack
- Small saucepan (for ganache)
- Offset spatula (for frosting)
Step-by-Step Instructions
Step 1: Preheat and Prepare
Preheat your oven to 350°F (175°C). Grease your heart-shaped cake pan and lightly dust with flour, or line with parchment paper for easy removal.
Step 2: Mix Dry Ingredients
In a large mixing bowl, sift together flour, cocoa powder, baking soda, baking powder, sugar, and salt. Whisk to combine.
Step 3: Add Wet Ingredients
Add eggs, buttermilk, oil, and vanilla extract to the dry mixture. Beat with an electric mixer until smooth.
Step 4: Incorporate Hot Liquid
Carefully pour in the boiling water (or hot coffee). Mix slowly—this will thin out the batter, but don’t worry; it’s supposed to be pourable.
Step 5: Bake
Pour the batter evenly into the heart-shaped pan. Bake for 35–40 minutes, or until a toothpick inserted in the center comes out clean.
Step 6: Cool
Let the cake cool in the pan for 10 minutes, then transfer to a wire rack. Cool completely before frosting.
Step 7: Prepare Ganache
In a small saucepan, heat heavy cream until steaming (do not boil). Pour over chocolate chips and let sit for 5 minutes. Stir until smooth, then whisk in butter.
Step 8: Frost the Cake
Pour the ganache over the cooled cake, letting it drip slightly over the sides for a glossy finish. Use an offset spatula to spread evenly.
Step 9: Decorate
Top with strawberries, raspberries, chocolate curls, or sprinkles to make it as festive as possible.
Step 10: Serve and Enjoy
Slice and serve with whipped cream or a scoop of vanilla ice cream for the ultimate indulgence.
Expert Tips for the Perfect Heart-Shaped Chocolate Cake
- Choose Quality Chocolate – High-quality cocoa and chocolate chips make a huge difference in taste.
- Use Buttermilk – It adds moisture and tenderness to the crumb.
- Coffee Trick – Replacing hot water with coffee enhances the chocolate flavor.
- Cool Before Frosting – Rushing this step can cause your ganache to slide off.
- Double Layers – Bake two cakes and stack them with ganache or strawberry jam for an even more impressive dessert.
Decorating Ideas
- Romantic Touch: Pipe whipped cream hearts on top.
- Berry Bliss: Cover with raspberries and dust with powdered sugar.
- Minimal Elegance: Leave glossy ganache as is for a sleek finish.
- Kids’ Party Fun: Add colorful sprinkles and candy toppings.
Serving Suggestions
Pair your Heart-Shaped Chocolate Cake with:
- A glass of champagne for a romantic evening
- A hot latte or cappuccino for cozy nights
- Fresh berries on the side for a refreshing contrast
- Vanilla ice cream for extra indulgence
Storage Tips
- Room Temperature: Store covered for up to 2 days.
- Refrigerator: Keeps well for 5–6 days in an airtight container.
- Freezer: Wrap slices in plastic wrap and foil; freeze for up to 3 months. Thaw before serving.
Nutritional Information (per slice, 1/12 of cake)
- Calories: ~380
- Carbohydrates: 52 g
- Sugars: 35 g
- Protein: 5 g
- Fat: 17 g
- Fiber: 3 g
(Values may vary depending on ingredients used.)
Why This Recipe Works
This Heart-Shaped Chocolate Cake balances richness with tenderness. The combination of cocoa, buttermilk, and ganache ensures every bite is moist, flavorful, and satisfying. It’s the perfect blend of elegance and comfort—ideal for creating unforgettable moments.
Conclusion
When words aren’t enough, a homemade Heart-Shaped Chocolate Cake speaks volumes. It’s more than a dessert—it’s a message of love, a centerpiece for celebrations, and a sweet indulgence that warms hearts.
Whether you’re baking it for Valentine’s Day, an anniversary, or just because, this cake will never disappoint. Follow this recipe, personalize it with your own decorations, and watch as smiles light up around the table.