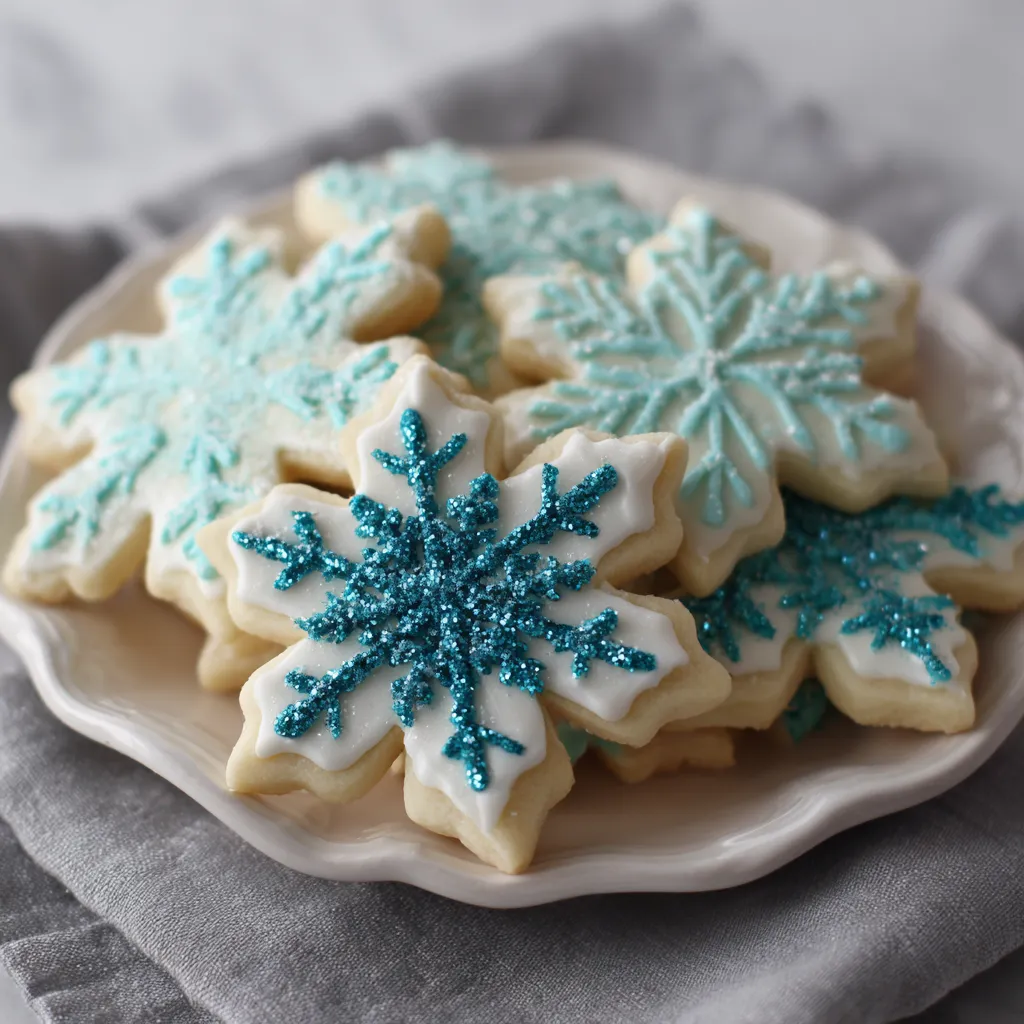
The holiday season wouldn’t be complete without cookies, and among the most beautiful and delicious options are Snowflake Sugar Cookies. These cookies are more than just a dessert—they’re edible works of art, perfect for Christmas parties, gift boxes, or cozy evenings with loved ones. With their delicate shapes and sparkling decorations, snowflake cookies bring a magical winter wonderland vibe straight to your table.
In this post, we’ll guide you through everything you need to know about making Snowflake Sugar Cookies from scratch: the best ingredients, essential tools, step-by-step preparation, decorating ideas, storage tips, and even nutritional information. Whether you’re an experienced baker or a beginner, this recipe is designed to help you achieve flawless results.
By the end, you’ll not only have delicious cookies but also a fun holiday tradition to share with friends and family.
Ingredients for Snowflake Sugar Cookies
To achieve cookies that hold their shape yet melt in your mouth, you’ll need a balance of butter, sugar, and flour. Here’s the detailed ingredient list:
For the Cookies
- 3 cups all-purpose flour (plus extra for rolling)
- 1 teaspoon baking powder
- 1/2 teaspoon salt
- 1 cup unsalted butter (softened at room temperature)
- 1 cup granulated sugar
- 1 large egg
- 1 teaspoon vanilla extract (or almond extract for a different flavor)
- 1 tablespoon milk (for moisture and tenderness)
For the Royal Icing (Decoration)
- 4 cups powdered sugar (sifted)
- 3 tablespoons meringue powder
- 6 tablespoons warm water (adjust as needed for consistency)
- Gel food coloring (optional, for blue or silver accents)
- Edible glitter or sprinkles (to mimic frosty snowflakes)
Kitchen Tools You’ll Need
- Mixing bowls
- Hand mixer or stand mixer
- Measuring cups and spoons
- Rolling pin
- Snowflake-shaped cookie cutters
- Baking sheets
- Parchment paper or silicone baking mats
- Wire cooling rack
- Piping bags and fine decorating tips
- Toothpicks (for detailed icing work)
Step-by-Step Preparation Instructions
1: Prepare the Dough
- In a medium bowl, whisk together flour, baking powder, and salt. Set aside.
- In a large bowl, cream the butter and sugar until light and fluffy (about 2–3 minutes).
- Add the egg, vanilla extract, and milk. Mix until combined.
- Gradually add the dry ingredients to the wet ingredients, mixing just until the dough comes together.
- Divide the dough into two equal portions, flatten into discs, wrap in plastic, and refrigerate for at least 1 hour.
2: Roll and Cut
- Preheat oven to 350°F (175°C).
- On a lightly floured surface, roll out one disc of dough to about 1/4-inch thickness.
- Use snowflake cookie cutters to cut shapes and place them on parchment-lined baking sheets.
- Chill the cut-out cookies on the baking sheet for 10–15 minutes before baking (helps retain shape).
3: Bake
- Bake cookies for 8–10 minutes, or until edges are just beginning to turn golden.
- Allow cookies to cool on the baking sheet for 2–3 minutes before transferring to a wire rack.
4: Make the Icing
- In a large bowl, combine powdered sugar, meringue powder, and warm water.
- Beat on medium speed until stiff peaks form (about 5 minutes).
- Divide icing into bowls and color as desired. Adjust consistency: thicker for outlining, thinner for flooding.
5: Decorate
- Outline cookies with piping icing, then flood the centers with thinner icing.
- Use a toothpick to create snowflake patterns or add dots and lines.
- Sprinkle with edible glitter or pearls while icing is wet for a frosty look.
- Allow cookies to dry at room temperature for 4–6 hours before stacking or packaging.
Helpful Tips for Perfect Snowflake Sugar Cookies
- Chill the dough twice – before rolling and after cutting. This prevents spreading and helps cookies hold their shape.
- Don’t overbake – sugar cookies should remain pale in color. Overbaking makes them too crisp.
- Royal icing patience – practice piping on parchment paper before decorating cookies.
- Creative designs – not all snowflakes are identical! Try mixing blue, white, and silver icings for a wintery feel.
- Storage – store cookies in an airtight container at room temperature for up to a week. Decorated cookies also freeze well (store undecorated for best results).
Fun Variations
- Flavored sugar cookies – Add lemon zest, peppermint extract, or almond extract to the dough for a festive twist.
- Glazed cookies – Skip royal icing and simply dip cooled cookies in a powdered sugar glaze with milk.
- Sparkling snowflakes – Use sanding sugar or pearl dust for shimmering effects.
- Chocolate snowflakes – Add 1/4 cup cocoa powder to the dough for chocolatey cookies.
Nutritional Value (per cookie, approx.)
- Calories: 120
- Fat: 5 g
- Carbohydrates: 18 g
- Sugar: 10 g
- Protein: 1 g
- Fiber: 0 g
Why Snowflake Sugar Cookies are Holiday Favorites
Snowflake Sugar Cookies aren’t just a recipe—they’re a holiday tradition. Families bake and decorate them together, making them the centerpiece of cookie exchanges and festive dessert tables. Their intricate beauty makes them perfect gifts, while their buttery flavor keeps everyone coming back for more.
Whether you package them in holiday tins, serve them with hot cocoa, or leave them out for Santa, these cookies add a magical sparkle to the season.
Conclusion
If you’ve been looking for the ultimate holiday cookie recipe, Snowflake Sugar Cookies are a must-try. They’re elegant, versatile, and fun to make with kids or on your own. With just a few simple ingredients and a little creativity, you can turn plain sugar cookies into frosty, edible snowflakes that wow your guests.
This holiday season, skip the store-bought cookies and create a homemade tradition that looks as beautiful as it tastes. ✨
