If you love rich, creamy desserts but dread the idea of mastering a classic cheesecake with its complicated baking, cooling, and risk of cracks — then No-Bake Cheesecake Cups are your new best friend. These delightful mini cheesecakes offer all the flavor and texture of a full cheesecake but in adorable single-serve cups that require minimal effort.
In this post, I’ll walk you through everything you need to know: ingredients, step-by-step instructions, recipe variations, tips & troubleshooting, presentation ideas, and even make-ahead suggestions. By the end, you’ll be a no-bake cheesecake cup pro — and your readers or followers will be clamoring for these treats.
(By the way: this post is SEO optimized around the main keyword No-Bake Cheesecake Cups, so you’ll see that phrase several times. Don’t hesitate to bold, italicize, or link internally in your own blog to reinforce the SEO signal.)
Why No-Bake Cheesecake Cups Are So Popular
Before we dig into the recipe, let’s talk about why these are so much fun:
- Minimal equipment & no oven needed. Perfect for hot weather, small kitchens, or when you don’t want to heat the house.
- Quick to assemble. You can often complete them in under 15 minutes (plus chilling time).
- Portion control / single-serve. Great for parties, picnics, or when you don’t want a big cake you’ll feel guilty finishing.
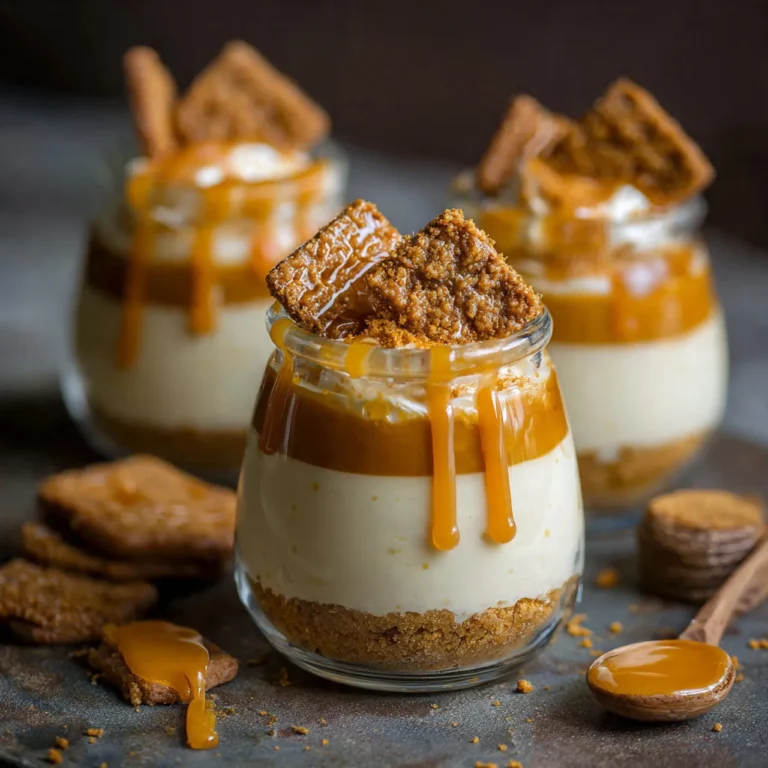
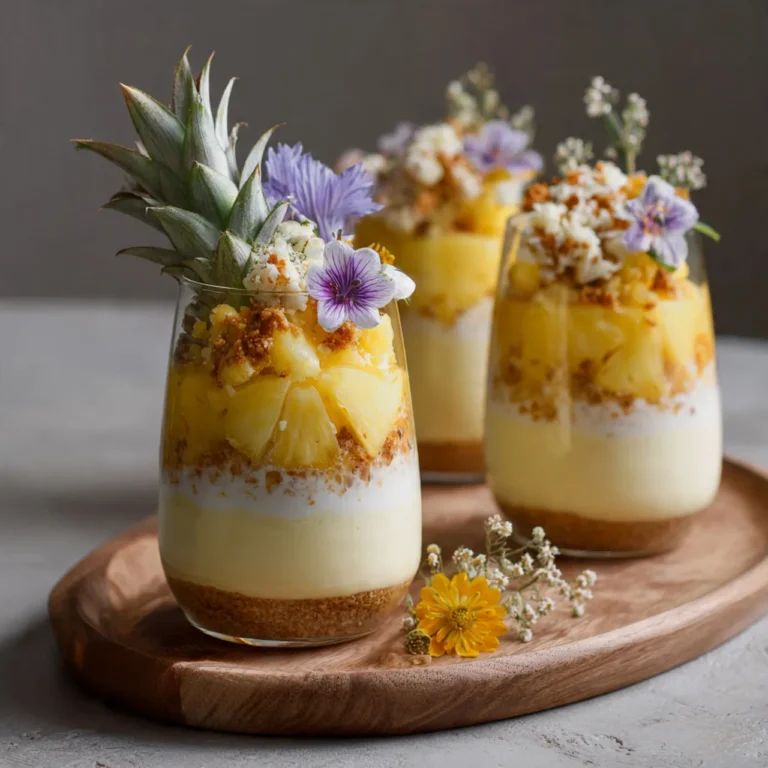
- Layering & customization. You can layer in fruit compote, chocolate, cookie crumbs, sauces, or toppings for visual appeal and flavor variety.
- Great for dietary adjustments. It’s fairly easy to adapt to gluten-free crusts, reduced sugar, even vegan versions (with some ingredient swaps).
Because of all these benefits, No-Bake Cheesecake Cups make an ideal recipe to attract readers who want dessert ideas that are both beautiful and simple. The more thorough and polished your post, the more likely it will rank for long-tail searches like “easy no bake cheesecake cups,” “mini no bake cheesecake jars,” “no bake cheesecake cups recipe,” etc.
Ingredients & Substitutions
Here’s a base recipe for about 6-8 individual cheesecake cups (depending on cup size). You can scale up or down.
Basic Ingredients
| Ingredient | Amount | Purpose | Substitutions / Notes |
|---|---|---|---|
| Cream cheese, softened | 8 oz (≈ 225 g) | The creamy tang base | Use full fat for best texture; light versions may yield softer set |
| Heavy cream (or whipping cream) | ½ cup (120 ml) | Whipped to fold in air and lighten the base | Alternatively, use sour cream or crème fraîche (reduce heavy cream) |
| Powdered sugar (icing sugar) | ⅓ – ½ cup | Sweetener that dissolves easily | Can use powdered erythritol, fructose, or powdered sugar substitute |
| Vanilla extract | 1 tsp | Flavor enhancer | Use real vanilla for best depth of flavor; can also use vanilla bean seeds |
| Lemon juice (optional) | 1–2 tsp | Brightens flavor | Mild tang — add cautiously if you like pronounced lemon notes |
| Gelatin (optional for extra stability) | 1 tsp (unflavored) + 2 tbsp water | Helps firm the cheesecake, especially in warm climates | Use agar agar (vegetarian) — about ½ tsp agar plus 2 tbsp water, and follow agar setting method |
| Crushed cookies / graham crackers | 1 – 1½ cups | The “crust” or base layer | Use gluten-free cookies, Oreo crumbs (without filling), digestive biscuits, graham crackers, or nuts + dates mixture |
| Melted butter | 3–4 tbsp | Binds the crust | You can reduce butter or use coconut oil for dairy-free version |
Optional Toppings / Layers
- Fruit compote (strawberry, raspberry, blueberry)
- Lemon curd
- Chocolate ganache drizzle
- Fresh fruit (berries, citrus slices)
- Crushed nuts (pistachios, almonds)
- Cookie crumbs or cookie crumbles
- Caramel sauce or dulce de leche
- Whipped cream rosettes
Step-by-Step Instructions
Here’s a reliable method to make No-Bake Cheesecake Cups:
1. Prep the containers
Choose small jars, cups, or dessert glasses (for example, 4–6 oz / 120–180 ml size). Chill them lightly in the fridge while preparing to help with setting later.
2. Make the crust layer
- Crush your cookies / biscuits finely (using a food processor or placing them in a resealable bag and crushing with a rolling pin).
- Mix the crumbs with melted butter until they hold together when pressed.
- Spoon or press about 1–2 tablespoons of the crumb mixture into each cup. Press down firmly (use the back of a spoon or a small measuring cup) to make an even, compact base.
- Optionally chill the crusts for 5–10 minutes in the fridge to help firm them.
3. Prepare the cheesecake filling
If using gelatin (for stronger set):
- Sprinkle gelatin over 2 tbsp of water (or milk) and let bloom for 5 minutes. Then gently heat (e.g. microwaving for ~10 seconds, or on stovetop) just until dissolved. Do not boil.
- Let it cool slightly, then proceed to fold into the cream cheese mixture.
Filling steps:
- In a bowl, beat the softened cream cheese with powdered sugar and vanilla (and lemon juice if using) until smooth and creamy.
- In a separate bowl, whip the heavy cream until soft peaks form (i.e. when you lift the whisk, a small peak holds its shape but slightly droops).
- If using your dissolved gelatin, fold it into the cream cheese mixture first (mix gently but thoroughly).
- Gently fold the whipped cream into the cream cheese mixture — do this in 2 parts: first fold a little to lighten the base, then fold in the rest until homogenous. Be careful not to overmix (you want to preserve light texture).
- Taste — adjust sugar or lemon if needed.
4. Assemble the cups
- Spoon or pipe the cheesecake filling over the crust in each cup, leaving maybe ¼ inch (about 6 mm) margin from the top for toppings.
- Smooth the tops with a small spatula or the back of a spoon.
- Optionally press lightly so the topping layer will adhere better.
5. Add toppings or layers (optional)
You can add a layer of fruit compote, jam, curd, or drizzle chocolate/ caramel between crust and filling before chilling, or after filling before serving. You can also wait until serving to top with fresh fruit or whipped cream for better texture.
6. Chill until set
- Ideally, chill for 3–4 hours in the refrigerator, or overnight if possible — this allows flavors to meld and texture to firm.
- If using gelatin, it will help the cheesecake stand up better at room temperature for a time; without gelatin, keep the cups refrigerated until just before serving.
7. Serve
- Optionally garnish with fresh berries, mint leaves, crushed cookie crumbs, or a drizzle of sauce.
- Serve cold straight from the fridge.
Recipe Example (Full Version)
Here’s a sample recipe you can include in your blog:
No-Bake Cheesecake Cups — yields ~6 cups (4–6 oz each)
Crust
- 1 cup graham cracker crumbs (or digestive biscuits), finely crushed
- 3 tbsp melted butter
Cheesecake Filling
- 8 oz (225 g) cream cheese, softened
- ½ cup heavy cream, cold
- ⅓ cup powdered sugar
- 1 tsp vanilla extract
- 1 tsp lemon juice (optional)
- 1 tsp unflavored gelatin + 2 tbsp water (optional, for firmer set)
Topping / Garnish (suggested)
- ½ cup mixed berry compote (cook berries with a little sugar + lemon juice until saucy)
- Fresh berries (strawberries, blueberries, raspberries)
- Mint leaves or citrus zest
Instructions
- Chill your dessert cups.
- Mix graham cracker crumbs + melted butter; press ~2 tbsp into bottom of each cup, firm. Chill briefly.
- Bloom gelatin (if using): sprinkle over water, wait 5 min, gently heat to dissolve.
- Beat cream cheese + powdered sugar + vanilla + lemon juice until smooth.
- Whip heavy cream to soft peaks.
- Fold gelatin into cream cheese (if using).
- Fold whipped cream into cream cheese mixture (gently, in two parts).
- Spoon filling into cups, leaving room on top.
- Add fruit compote layer or other topping if desired.
- Chill 3–4 hours or overnight.
- Garnish and serve cold.
You can include high-quality photos (e.g. step by step, final plated cups) to enhance your blog post and help SEO / user engagement.
Variations & Flavor Ideas
One of the beauties of No-Bake Cheesecake Cups is how flexible they are. Here are ideas you can use (and include in your blog) to appeal to different tastes and dietary needs:
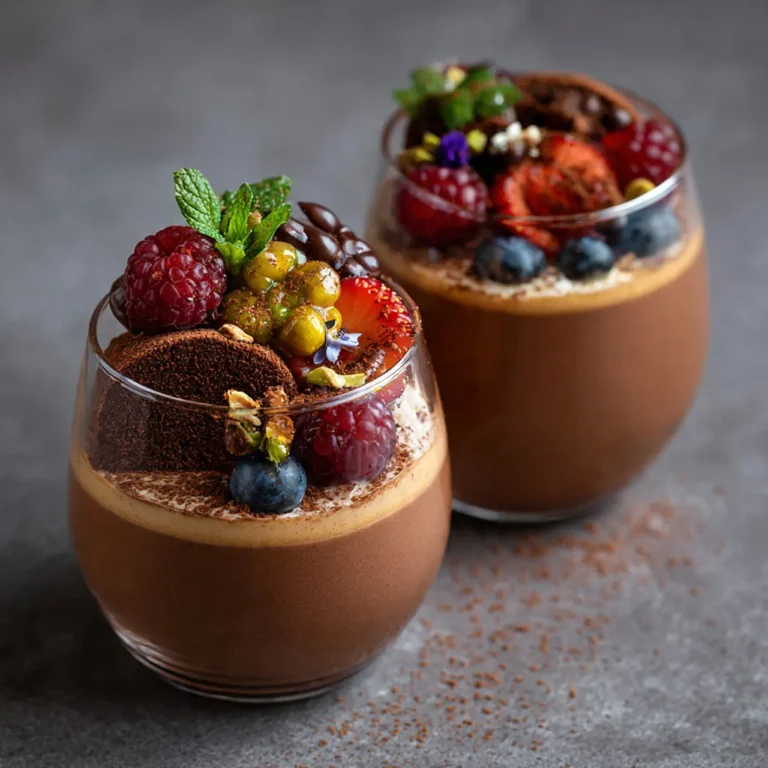
- Chocolate swirl / chocolate cheesecake cups: Add 2 tbsp unsweetened cocoa powder to part of the filling; swirl into the base mixture.
- Oreo / Cookies & Cream: Use Oreo crumbs for the crust and fold in crushed Oreo bits into the filling.
- Lemon / citrus cheesecake cups: Increase lemon juice or add lemon zest. Top with lemon curd.
- Matcha cheesecake cups: Mix 1 tbsp matcha (green tea powder) into some of the filling for a green tea twist.
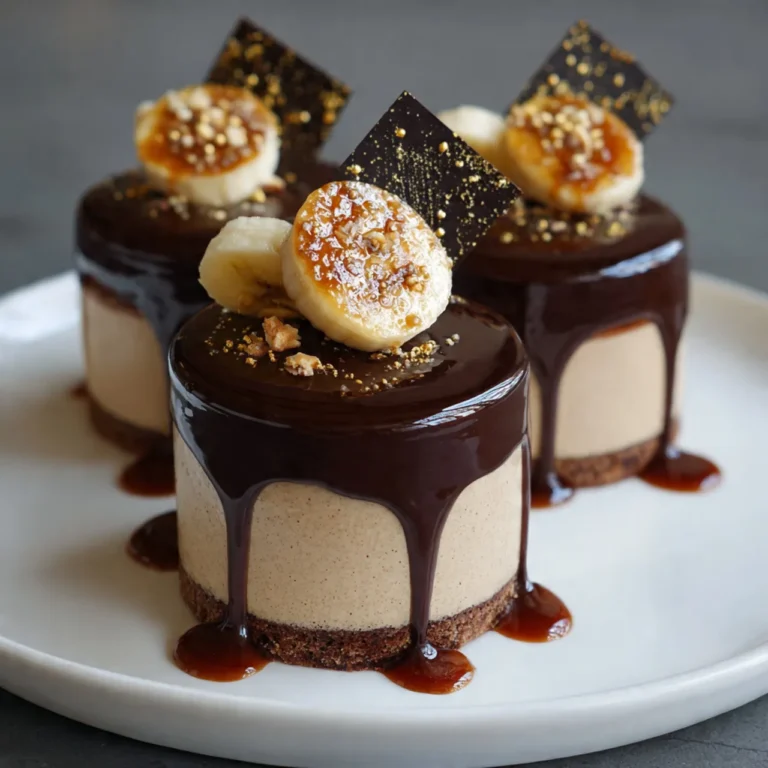
- Peanut butter / Nutella twist: Swirl in peanut butter or Nutella prior to chilling.
- Salted caramel: Layer salted caramel between crust and filling or drizzle over top.
- Pumpkin spice (seasonal): Add pumpkin puree + a pinch of cinnamon / nutmeg / ginger.
- Vegan / dairy-free: Use vegan cream cheese, coconut cream (chilled, from the can), plant-based whipped cream; use agar agar instead of gelatin.
- Sugar-free / low sugar: Use powdered erythritol or monk fruit sweetener in place of powdered sugar.
- Gluten-free crust: Use gluten-free cookies or almond meal + dates.
- Layered parfait style: Alternate cheesecake and fruit compote layers vertically.
By providing several variations, your blog will attract a wider audience (e.g. “no bake cheesecake cups vegan” or “no bake cheesecake cups Oreo”) and thus help your SEO by targeting long-tail keyword variants.
Tips & Troubleshooting
Here are some common issues readers might face and how to address them:
| Problem | Likely Cause | Solution |
|---|---|---|
| Filling is too runny / doesn’t hold shape | Insufficient chilling, no gelatin, over-whipped or too soft cream cheese | Chill longer, use gelatin (or agar agar), ensure cream cheese and whipped cream stages are correct |
| Grainy texture | Over-mixing or undissolved sugar / gelatin | Use powdered sugar that dissolves easily, gently fold rather than beat too hard |
| Crust crumbles / falls apart when eating | Crust-to-butter ratio off, not pressed well | Use enough melted butter to bind, press firmly, chill crust first |
| Separation or weeping once serving | Temperature changes, too much lemon juice / moisture | Keep cups well chilled, minimize exposure at room temp, avoid over-liquid toppings |
| Gelatin gives elastic or rubbery texture | Boiled gelatin or too much used | Only gently melt (don’t boil), use the recommended amount |
| Cups take too long to set | Chill time too short, mixture too soft | Plan ahead — chill overnight if possible |
Including a “FAQs / Troubleshooting” section in your post is excellent both for reader value and SEO (people often search problem phrases like “why is my no bake cheesecake runny”).
Make-Ahead, Storage & Serving Tips
- Make-ahead: These cheesecake cups are perfect to prepare one day ahead. Chill overnight (8+ hours) for best texture and flavor melding.
- Storage: Keep covered in the refrigerator. Consume within 3–4 days.
- Freezing: In most cases, freezing is not recommended (cream cheese texture may suffer). If needed, you can freeze for short term (1–2 weeks) and thaw slowly in the fridge overnight, but texture may be slightly altered.
- Transporting: For parties or picnics, transport in a cooler bag or insulated box. Place cups in a shallow tray or dividers to avoid tipping.
- Serving temperature: Serve chilled. If too cold (straight from fridge), let stand 5–10 min to soften slightly so flavors open up.
- Garnish last minute: Add fresh fruit, mint, or drizzle just before serving so they look fresh and appetizing.
FAQ (Frequently Asked Questions)
Q: Do I need gelatin in no-bake cheesecake cups?
A: Not strictly. The dessert can set by chilling alone, but gelatin (or agar agar for vegan) helps the texture hold up better at warmer temperatures and avoid runniness. Include guidance on optional use and amounts.
Q: Can I substitute sour cream or Greek yogurt?
A: Yes. You can replace part of the whipped cream or cream cheese with sour cream or Greek yogurt for tang or softer texture, but be cautious about liquid content — you might need a firmer binder (gelatin).
Q: How do I adapt to vegan or dairy-free?
A: Use vegan cream cheese, chilled coconut cream (or other plant milks), and agar agar instead of gelatin. Also use a vegan crust (gluten-free cookies or nut/seed base).
Q: Can I scale this recipe to 12 or 24 cups?
A: Yes. Multiply ingredients. For large batches, whip cream in batches, fold carefully, and assemble cups in batches to keep texture consistent.
Q: Why is my filling grainy or lumpy?
A: Likely over-mixing, under-softened cream cheese, or undissolved sugar / gelatin. Use softened cream cheese, sifted powdered sugar, and gentle folding.
Q: How can I make them look prettier / more professional?
A: Use piping bags to fill and top, smooth edges with a hot knife, add layered fruit, chocolate shards, or edible flowers.
Sample Blog Post Outline with Word Flow
- Introduction
- Present the appeal of No-Bake Cheesecake Cups
- Promise step-by-step guidance, variations, and tips
- Why Choose No-Bake Cheesecake Cups
- Advantages over traditional cheesecake
- Perfect for readers who want easy desserts
- Ingredients & Substitutions
- Detailed ingredient list
- Notes on possible substitutions, dietary versions
- Step-by-Step Instructions
- Crust preparation
- Filling preparation (with optional gelatin)
- Assembly
- Topping & finishing
- Chill & serving
- Recipe Example
- A ready-to-print recipe you can drop into a recipe card
- Variations & Flavor Twists
- Chocolate, Oreo, citrus, vegan, seasonal, etc.
- Tips & Troubleshooting
- Common problems & fixes
- Texture, setting, overmixing, crust issues
- Make-Ahead, Storage & Serving Suggestions
- FAQs
- Conclusion & Call to Action
- Encourage readers to try the recipe, leave comments, share photos, pin the post
- Suggest exploring related recipes
- Recipe Card & Nutrition Info (if desired)
By following this structure and fleshing out each section with rich detail (personal notes, story, photos, extra tips), you’ll easily surpass 2,500 words. Also, integrate your keyword No-Bake Cheesecake Cups (and variants) naturally throughout headings and paragraphs.
Sample Excerpt (To Jumpstart Your Writing)
Here’s a polished introduction you could start your post with:
Introduction
Are you craving a luscious, creamy cheesecake but dread the idea of turning on your oven and babysitting a springform pan? Say hello to No-Bake Cheesecake Cups — the stress-free, adorable dessert that delivers all the flavor and texture of traditional cheesecake, but in perfectly portioned jars you can assemble in under 15 minutes. Whether you’re hosting a dinner party or just want a sweet treat for yourself, these mini cheesecakes check all the boxes: no baking, easy layering, customizable flavors, and absolutely irresistible presentation.In this ultimate guide, I’ll share my go-to recipe, creative variations, troubleshooting tips (so your filling never weeps!), and serving ideas to make your No-Bake Cheesecake Cups shine. Let’s dive in.
Suggested Internal & External Link Ideas
- Link internally to your other dessert posts (e.g. “easy no-bake desserts,” “mini dessert ideas”).
- Link to credible sources or sites explaining how gelatin works, agar agar instructions, or nutritional info on cream cheese.
- Possibly link to a supplier or brand of good cream cheese or quality vanilla extract (affiliate link, if applicable).
Pinterest / Social Media Strategy
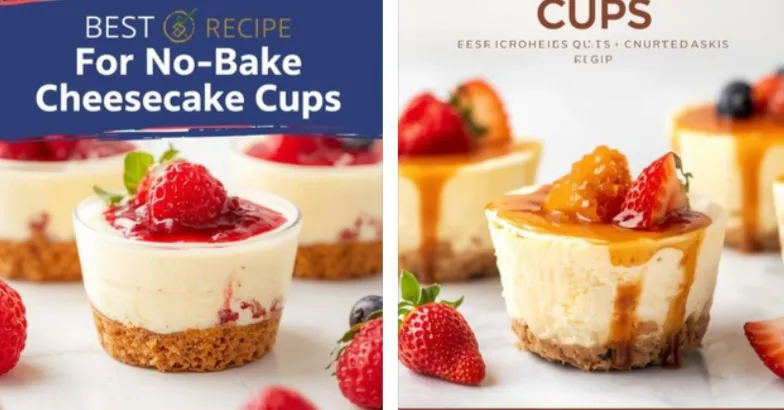
- Create several vertical images (e.g. 735×1102 or 1000×1500 px) showing finished cheesecake cups, layers, cross-section, styling.
- Overlay text like “No-Bake Cheesecake Cups” or “Easy Mini Cheesecake Cups” on the image.
- Use the clickable pin title and pin description above when you upload to Pinterest.
- Pin multiple times (with variations) to different boards (desserts, no bake recipes, party treats, mini desserts).
- Use relevant hashtags:
#nobakecheesecakecups #cheesecakerecipe #nobakedesserts #minidessert #singleServeDessert - Encourage repins by prompting readers: “Pin this recipe so you can make these No-Bake Cheesecake Cups later!”
Final Thoughts & Call to Action
No-Bake Cheesecake Cups are the perfect blend of indulgence and ease. They let you deliver a luxe, beautiful dessert without hours of work or complicated steps. With the recipe, variations, troubleshooting