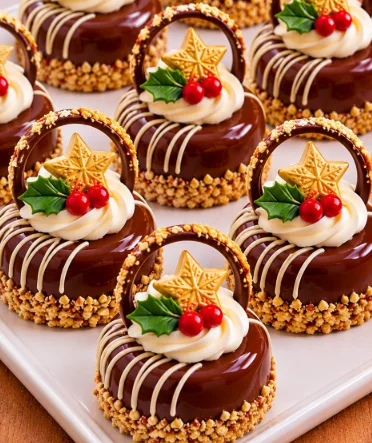
Christmas is the perfect time to fill your kitchen with the wonderful aroma of freshly baked cookies. These Christmas Wreath Sugar Cookies are buttery, tender, and beautifully decorated with vibrant green frosting, festive red bows, colorful sugar pearls, and golden stars.
Inspired by traditional Christmas wreaths, these adorable cookies are perfect for holiday parties, Christmas cookie exchanges, homemade gifts, or simply enjoying with a warm cup of coffee or hot chocolate.
The best part? They look like something from a professional bakery, but you can easily make them at home with a few simple ingredients and a little creativity.
Recipe Overview
-
Prep Time: 30 minutes
-
Chilling Time: 30 minutes
-
Baking Time: 10–12 minutes
-
Decorating Time: 40 minutes
-
Total Time: Approximately 1 hour 50 minutes
-
Servings: 18–24 cookies
-
Difficulty: Easy to moderate
Ingredients
For the Sugar Cookies
-
2½ cups (315 g) all-purpose flour
-
¾ cup (170 g) unsalted butter, softened
-
¾ cup (150 g) granulated sugar
-
1 large egg
-
2 teaspoons vanilla extract
-
½ teaspoon baking powder
-
¼ teaspoon salt
-
½ teaspoon almond extract (optional)
For the White Cookie Icing
-
2 cups (240 g) powdered sugar
-
2–3 tablespoons milk
-
½ teaspoon vanilla extract
-
1 teaspoon light corn syrup (optional, for a glossy finish)
For the Green Buttercream Wreaths
-
½ cup (115 g) unsalted butter, softened
-
1½ cups (180 g) powdered sugar
-
1–2 tablespoons heavy cream or milk
-
½ teaspoon vanilla extract
-
Green gel food coloring
For the Christmas Decorations
-
Red fondant for decorative bows
-
Gold fondant or gold-colored edible stars
-
Small red, white, and green sugar pearls
-
Edible gold luster dust (optional)
-
Extra powdered sugar for rolling the fondant
Step-by-Step Instructions
Step 1: Prepare the Cookie Dough
In a large mixing bowl, beat the softened butter and granulated sugar together using an electric mixer. Continue mixing for about 2–3 minutes until the mixture becomes light, creamy, and fluffy.
Add the egg, vanilla extract, and optional almond extract. Beat until everything is well combined.
In a separate bowl, whisk together the flour, baking powder, and salt.
Gradually add the dry ingredients to the butter mixture. Mix on low speed just until a soft dough forms.
Avoid overmixing, as this can make the cookies tough rather than tender.
Step 2: Chill the Dough
Divide the dough into two equal portions and flatten each into a disk.
Wrap each portion tightly in plastic wrap and refrigerate for at least 30 minutes.
Chilling helps the butter firm up and prevents the cookies from spreading too much during baking. It also makes the dough much easier to roll and cut.
Step 3: Cut Out the Christmas Cookies
Preheat your oven to 350°F (175°C) and line two baking sheets with parchment paper.
Lightly flour your work surface and roll the chilled dough to approximately ¼ inch (6 mm) thickness.
Using a round cookie cutter with scalloped or fluted edges, cut the dough into individual cookies.
The cookies in the photo have beautifully scalloped edges, which give them an elegant bakery-style appearance.
Place each cookie on the prepared baking sheets, leaving a little space between them.
Gather the remaining dough, reroll gently, and continue cutting until all the dough has been used.
Step 4: Bake Until Lightly Golden
Bake the cookies in the preheated oven for approximately 10–12 minutes, depending on their size and thickness.
The cookies should remain pale on top, with just a hint of golden color around the edges.
Remove them from the oven and allow them to rest on the baking sheet for 5 minutes before transferring them to a wire rack.
Let the cookies cool completely before decorating. Decorating warm cookies will cause the icing and buttercream to melt.
Step 5: Make the White Icing
In a medium bowl, combine the powdered sugar, vanilla extract, and 2 tablespoons of milk.
Stir until smooth, gradually adding a little more milk if necessary.
The icing should be thick enough to coat the cookies without running off the edges.
For an extra glossy finish, stir in the optional light corn syrup.
Spoon a small amount of icing onto each cooled cookie, then spread gently toward the edges using a small offset spatula or the back of a spoon.
Leave a narrow border so the beautiful scalloped cookie edges remain visible.
Allow the icing to set completely before adding the buttercream decorations. This may take 1–2 hours, depending on the consistency and room temperature.
Step 6: Prepare the Green Buttercream
In a clean mixing bowl, beat the softened butter until smooth and creamy.
Gradually add the powdered sugar, mixing on low speed until fully incorporated.
Add the vanilla extract and 1 tablespoon of heavy cream or milk.
Beat the frosting for another 2–3 minutes until light and fluffy. Add a little more cream if needed to reach a smooth, pipeable consistency.
Add a few drops of green gel food coloring and mix until you achieve a rich Christmas-tree green.
Transfer the buttercream to a piping bag fitted with a small star or leaf tip.
Step 7: Pipe the Christmas Wreaths
Once the white icing has completely set, begin decorating your cookies.
Hold the piping bag vertically and pipe small green buttercream stars or leaves in a circular shape near the outer edge of each cookie.
Continue piping until you have formed a complete wreath.
For a fuller, more realistic appearance, overlap the small buttercream leaves slightly.
Try to leave a clear space in the center of each wreath for the decorative golden star.
The rich green frosting against the smooth white icing creates a beautiful Christmas contrast.
Step 8: Add the Red Christmas Bows
Roll out the red fondant on a surface lightly dusted with powdered sugar.
Cut small strips and shape them into festive bows with two loops and ribbon tails.
Secure each bow with a tiny piece of fondant pressed around the center.
Place one red bow at the top of each green wreath.
You can prepare the bows in advance and allow them to firm up slightly before placing them on the cookies.
For an easier decorating method, use ready-made edible fondant bows.
Step 9: Decorate with Golden Stars and Sugar Pearls
Cut small stars from gold-colored fondant using a miniature star-shaped cutter.
If desired, brush the stars with edible gold luster dust for a beautiful shimmering effect.
Place one golden star in the center of each cookie, just below the red bow.
Next, carefully add tiny red, white, and green sugar pearls around the buttercream wreaths.
These colorful decorations resemble miniature Christmas ornaments and bring the cookies to life.
Press each sugar pearl gently into the buttercream so it stays securely in place.
Step 10: Let the Decorations Set
Once all the cookies are decorated, place them on a clean tray in a cool room.
Allow the decorations to firm up before serving or packaging.
Arrange the finished Christmas Wreath Sugar Cookies on a white serving platter for a particularly elegant presentation.
For an extra festive look, decorate the surrounding table with pine branches, red Christmas ornaments, pinecones, and warm holiday lights.
Tips for Making Perfect Christmas Wreath Cookies
1. Use room-temperature butter. Softened butter creams more easily with sugar, giving the cookies a tender, delicate texture.
2. Do not skip chilling the dough. Chilled dough helps the cookies keep their beautiful scalloped shape during baking.
3. Avoid overbaking. Sugar cookies should remain light in color. Overbaking can make them dry and hard.
4. Use gel food coloring. Gel coloring creates vibrant green buttercream without adding too much liquid.
5. Allow the white icing to set. If the base icing is still wet, the green buttercream decorations may slide or lose their shape.
6. Prepare fondant decorations ahead of time. Making the bows and stars in advance makes the final decorating process much easier.
Creative Decoration Variations
One of the best things about Christmas Wreath Sugar Cookies is how easily they can be customized.
Snowy Christmas Wreath Cookies
Pipe small dots of white icing over the green wreaths to create the appearance of freshly fallen snow.
Elegant Gold and White Wreaths
Replace the red bows with white fondant bows and decorate the green buttercream with gold sugar pearls.
This variation is especially beautiful for elegant Christmas dessert tables.
Mini Christmas Wreath Cookies
Use a smaller cookie cutter to make bite-sized versions. Mini cookies are perfect for holiday dessert platters and homemade edible gifts.
Chocolate Christmas Wreath Cookies
Replace ¼ cup of the flour with unsweetened cocoa powder to make chocolate-flavored sugar cookies. The rich chocolate base pairs beautifully with sweet vanilla icing.
How to Store Christmas Wreath Sugar Cookies
Proper storage helps the cookies stay fresh while protecting their delicate decorations.
At room temperature: Undecorated sugar cookies can be stored in an airtight container for up to 5 days in a cool, dry place.
In the refrigerator: Because these cookies contain buttercream frosting, store the decorated cookies in an airtight container in the refrigerator for up to 5 days. Let them sit briefly at room temperature before serving.
In the freezer: Freeze the undecorated sugar cookies for up to 3 months. Thaw completely before adding the icing and decorations.
If stacking decorated cookies, place them in a single layer whenever possible to prevent the bows, stars, and buttercream wreaths from becoming damaged.
Frequently Asked Questions
Can I make these Christmas cookies ahead of time?
Yes! You can prepare the cookie dough up to 2 days in advance and keep it refrigerated. You can also bake the cookies a day or two before decorating.
Can I use store-bought frosting?
Absolutely. Store-bought vanilla buttercream can be colored green and used to create the wreaths. However, make sure it is firm enough to hold its shape when piped.
Do I need special decorating equipment?
A piping bag with a star tip makes the wreaths easier to create, but you can also use a small plastic food bag with one corner cut off for a simpler design.
Can I make these cookies without fondant?
Yes. Instead of fondant bows and stars, use red and yellow royal icing decorations or ready-made edible Christmas decorations.
Are these cookies suitable for Christmas gift boxes?
Definitely! These beautiful cookies make thoughtful homemade Christmas gifts. Just allow the decorations to firm up and package them carefully in sturdy cookie boxes.
Final Thoughts
Christmas Wreath Sugar Cookies are more than just delicious holiday treats — they are beautiful edible decorations that bring color, warmth, and festive charm to any Christmas celebration.
With their delicate buttery texture, smooth vanilla icing, vibrant green buttercream wreaths, bright red bows, and shimmering golden stars, these cookies are guaranteed to stand out on your holiday dessert table.
Whether you’re baking with family, preparing Christmas party desserts, or creating homemade gifts for friends and neighbors, this recipe is a wonderful way to celebrate the magic of the holiday season.
Make a batch of these festive Christmas Wreath Sugar Cookies and turn a simple holiday baking afternoon into a beautiful Christmas tradition!